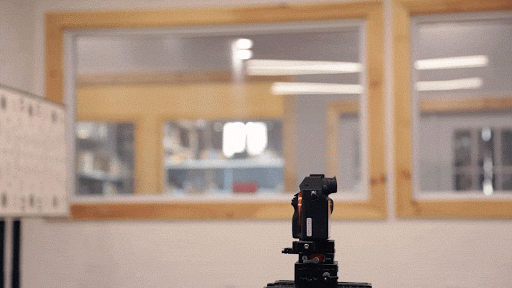
So you are a college student, or you’re green in the industry, and you have access to a DSLR or prosumer camera to shoot a project, and you even have some sort of a budget for real accessories! You want to show up on set with a professional camera build with real deal cinema accessories. That’s awesome, but the downside is the overwhelming sense of dread that something won’t work properly or that you don’t know how to make your accessories play nicely together with whichever camera you have access to. This guide will teach you what you need within a modular camera system to make the best use of whatever equipment is available to you and ensure that it all works together, to avoid a catastrophe on set.
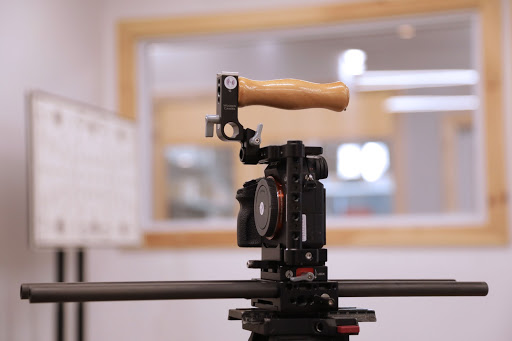
Cage
The first thing to think about is adding structure and mounting points to the camera, as most prosumer cameras are weak in this area. The best way to do this is a cage that is purpose-built for whichever camera you’re using. This will keep things more solid and give you standard threads to bolt on accessories. Most cages also include some sort of option for a top handle. Once your camera build is 3 times the size of the camera body itself, you’ll be glad you have a spot to grab it.

Baseplate/Bridge Plate/Rods
A Bridge Plate (or baseplate) serves a couple functions. Here at Expressway, we typically refer to a baseplate as an item that has some sort of quick release function, rod capabilities, and mounting holes at the bottom, and a Bridge Plate as an item that does all of the above but also slides onto a dovetail. This is widely debated and you will hear the terms used interchangeably elsewhere. For most cases, a plate with 15mm rods are fine, but if your build is very long and/or heavy, consider using 19mm rods. You can also have different spacings for lightweight (LWS) and Studio setups. If your bridge plates allow for the rods to slide all the way through, ensure you have rods long enough to reach the focus barrel on the lens all the way through to the back, leaving room to mount accessories on the rods both in front and in back of the camera body. If you are using a stills camera or otherwise small camera, you may have to use a baseplate with a riser in addition to the bridge plate, to bring the center of the sensor to the same height as the lens’ optical center.
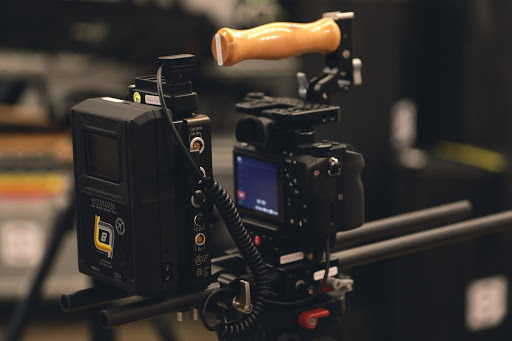
Power
Now that we have our camera mounted on a base and rods attached, it’s time to set ourselves up to power our camera and all the onboard accessories we’ll add. We’ll do this by adding a battery plate with a rod mount. I know what you’re saying: “But Expressway, my camera, and accessories already have their own batteries”! And you’re right. But trust us, having one large battery to power everything is way easier to monitor, easier to charge, and easier to change. Find a rod-mountable battery plate (Either Gold-Mount or V-Mount work, but Gold Mount is more secure) with one or more D-Tap ports. This is the most common accessory power connector. Also, add a D-Tap Splitter to your order, and have as many D-Tap ports as you have accessories that need power. Normally a 1 to 4 D-Tap Splitter is plenty. If you have a choice, plug the splitter into a port on the battery plate rather than the battery itself, so you don’t have to unplug the splitter every time you change batteries. When you add your accessories, ensure that they have some sort of D-Tap power cable. Most cameras have a D-Tap to whatever connecter they use for power input, but some cameras need a “dummy battery”, which is a D-Tap power cable connected to the casing of whatever battery the camera uses.
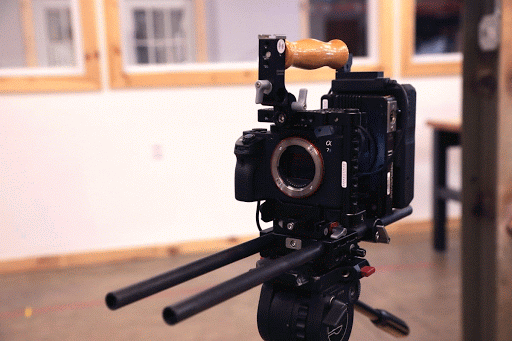
Lens Mount/Adapter
Not every lens fits on every camera. If you have the opportunity to use professional cinema lenses, often they will be in PL Mount. EF Mount is another option, but PL (Positive Lock) is more secure and more widely used when it comes to real cinema lenses. Sometimes the camera that you are using has an interchangeable mount system, and sometimes you’ll have to use an adapter. It gets a little tricky because not every mount can be adapted to every other mount. For example, Sony’s E-Mount and the Micro 4/3 mount are both easily adaptable to EF and PL, but you can’t put an EF adapter on a PL mount or vice versa with some very rare exceptions. The moral of the story is make sure that the mount on your camera and the mount on your lenses match, and if they don’t, ask the rental tech to either change the mount or include an adapter (if possible, which, again, sometimes it is not).
Lens Support
Now we have a lens on our camera, that’s great! But there are some situations where you have to add some support to your lens. A lens support is a rod-mountable threaded bolt that creates a tight physical link between your rods and your lens and ensures that the weight of the lens doesn’t cause it to sag and put strain on the lens mount. If your lens is very long and/or heavy, a lens support is definitely recommended. If you are using an adapter for your lens mount, or a weaker (non-PL) mount, take extra consideration. Short, light prime lenses most likely do not need to be supported, but if the lens has a threaded hole in the bottom, chances are good the manufacturer thinks you should probably support it. And they are probably right.
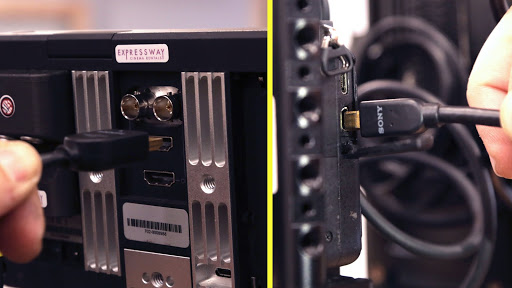
Monitoring
Another downfall is that on many smaller cameras not purpose-built for cinema purposes, the monitor is tiny, not adjustable, and on the back of the camera. Even larger cine cameras that have adjustable high-resolution EVFs and LED displays benefit from external monitoring. Find out what video output your camera has (SDI, HDMI, Micro HDMI, etc) and ensure that the monitor you’ll be using has an input that matches. Also, make sure you have the proper cabling and an adjustable arm to mount the monitor on. Power the monitor with a D-Tap Cable that matches its power input or a P-Tap to dummy battery.
Other Accessories
There is a myriad of other accessories you can add to your camera but the basics are the same. Either an accessory is mechanical (lens support, manual follow focus, matte box, etc), or electronic (wireless follow focus, wireless video transmitter, etc). Ensure that any mechanical accessories physically fit together correctly. Electronic accessories have to be physically compatible and ALSO correctly cabled, considering power cables and signal cables. ALWAYS push for a camera checkout/prep day. This way you can build your camera and, with the help of your friendly neighborhood rental technician, solve any problems BEFORE you start shooting. Showing prepared and confident, with a professionally rigged camera is a very good look!