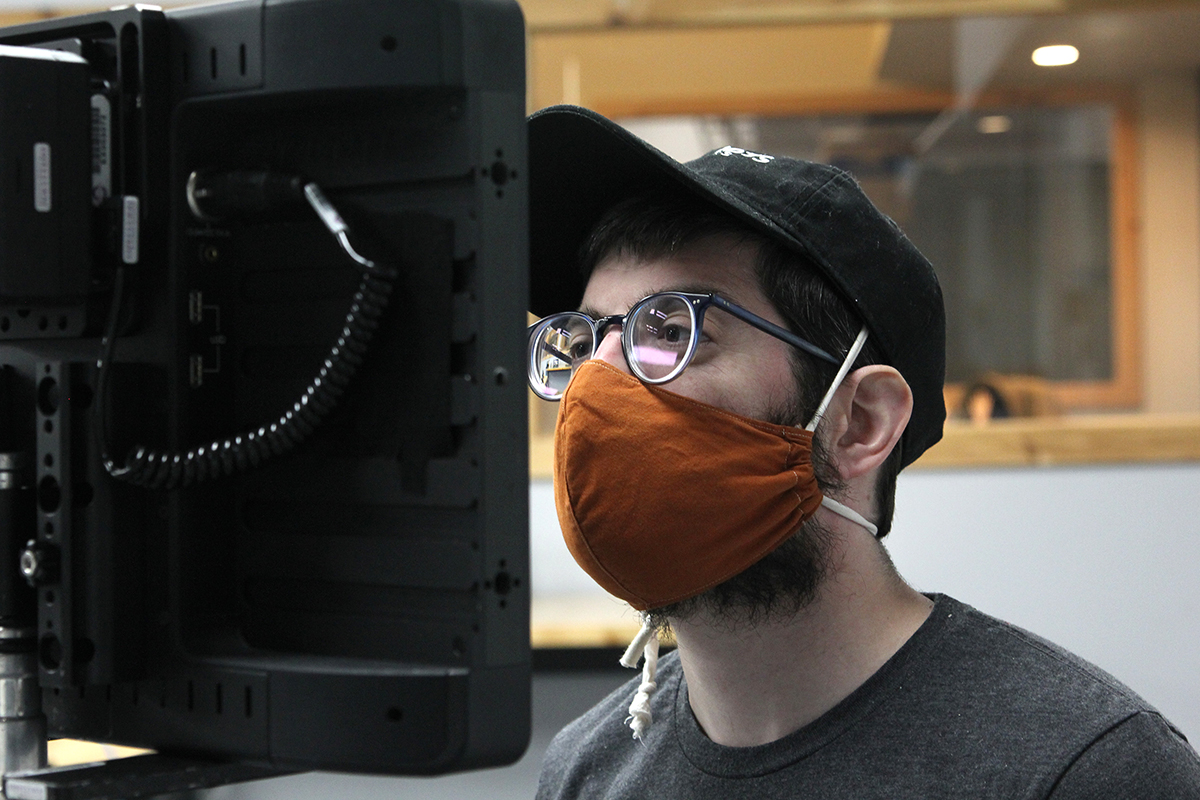
So you’re starting to get a sense of what the new norm is for COVID productions and slowly starting to place the pieces of what changes to equipment requirements will likely stay. The way you approach monitoring on your set is something you’re realizing is going to be something to consider for almost every job from now until there’s an all-clear on the pandemic.
The obvious answer would be to add additional production monitors and, depending on how far these need to be from each other, additional wireless receivers for them. However, with the possibility of reduced production budgets, the addition of providing testing and PPE for your crew, the additional locations supplies to enable socially distant meals and holding, etc. – the extra dollars allocated for COVID related protocols can be stretched thin very quickly.
As someone that was a tech and a rental agent, I knew that monitoring was going to be something that almost every job is going to be looking to expand during COVID. I had a few prerequisites that I thought would be the most important factors to clients:
- Convenience and ease-of-use with a fairly low learning curve
- Relatively familiar setup for AC’s
- Cost
Teradek Presents the Serv Pro
The Teradek Serv Pro and its features hit all those prerequisites in my opinion. It’s a transmitter that self-generates a signal that allows up to ten iOS devices (or computers with MacOS Catalina) within 300’ to connect to it and monitor an HD feed with very little delay. Alternatively, you can also connect the Serv Pro to an existing WiFi network (like at a home, office, or studio) and any iOS device on the same WiFi network can view the feed (as well as use the internet at the same time, unlike if you were to only connect to the self-generated network.)
- Convenience and ease-of-use with a low learning curve
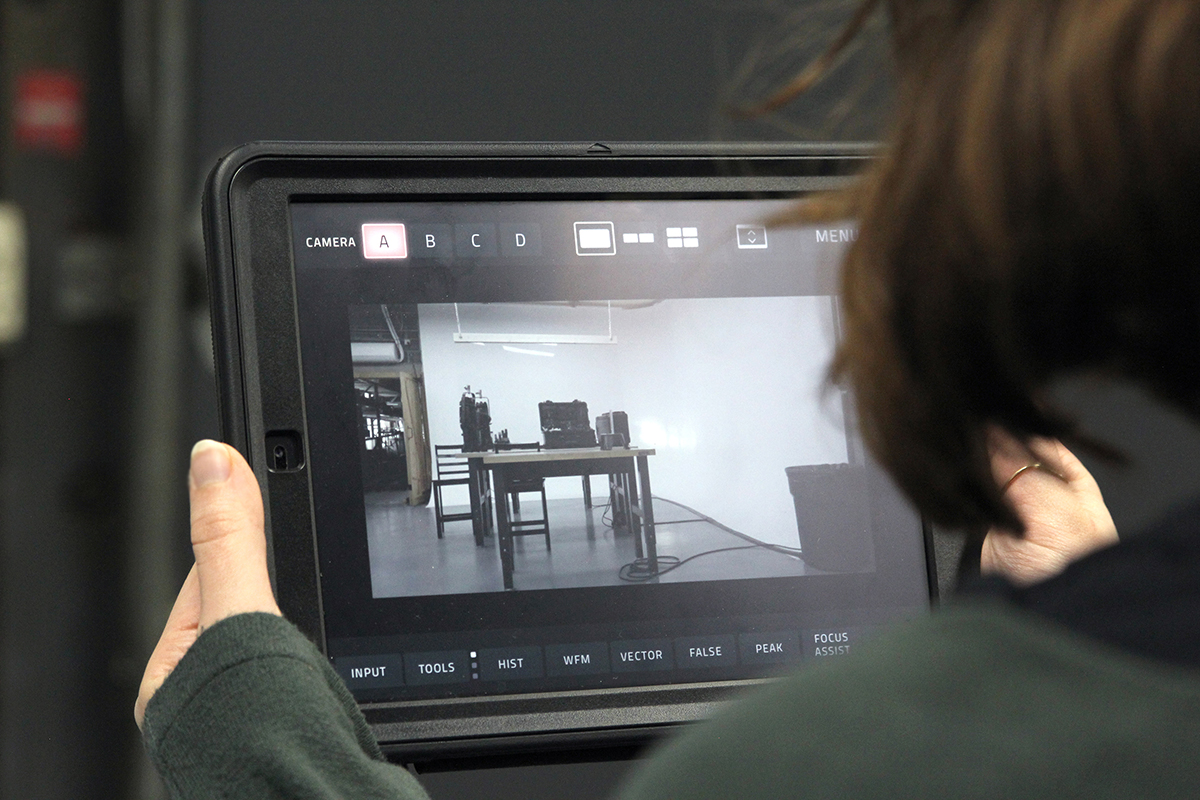
- The Serv Pro generates its own signal up to 300’ so anybody with an iPhone, iPad, or Macbook (with macOS Catalina) can download the free VUER app, join the Serv Pro’s WiFi network, and start viewing the feed.
- Relatively simple setup for AC’s
- Teradek is a brand that many AC’s have likely worked with, so the device itself feels familiar and should be able to plug into their existing workflow and prep with minimal effort via DTap for power, using SDI or HDMI for signal.
- Cost
- Our Teradek Serv Pro Monitoring Kit includes one Serv Pro and one iPad for roughly the same cost as one production monitor. So that gives you the potential capability to have ten people viewing the feed safely from their own devices (or we have additional iPads to rent) versus 2-3 socially distant crew for one monitor.
As mentioned previously, there are a couple of ways to connect to the Serv Pro. You’re able to do this through its self generated wireless signal or connecting through an existing WiFi Network. Let’s dive into what that looks like!
Serv Pro Self-Generated Wireless Signal
The first way to connect is using the Serv Pro’s self generated wireless signal. This will get monitoring from the Serv Pro to iOS devices up to 300’ away line-of-site.
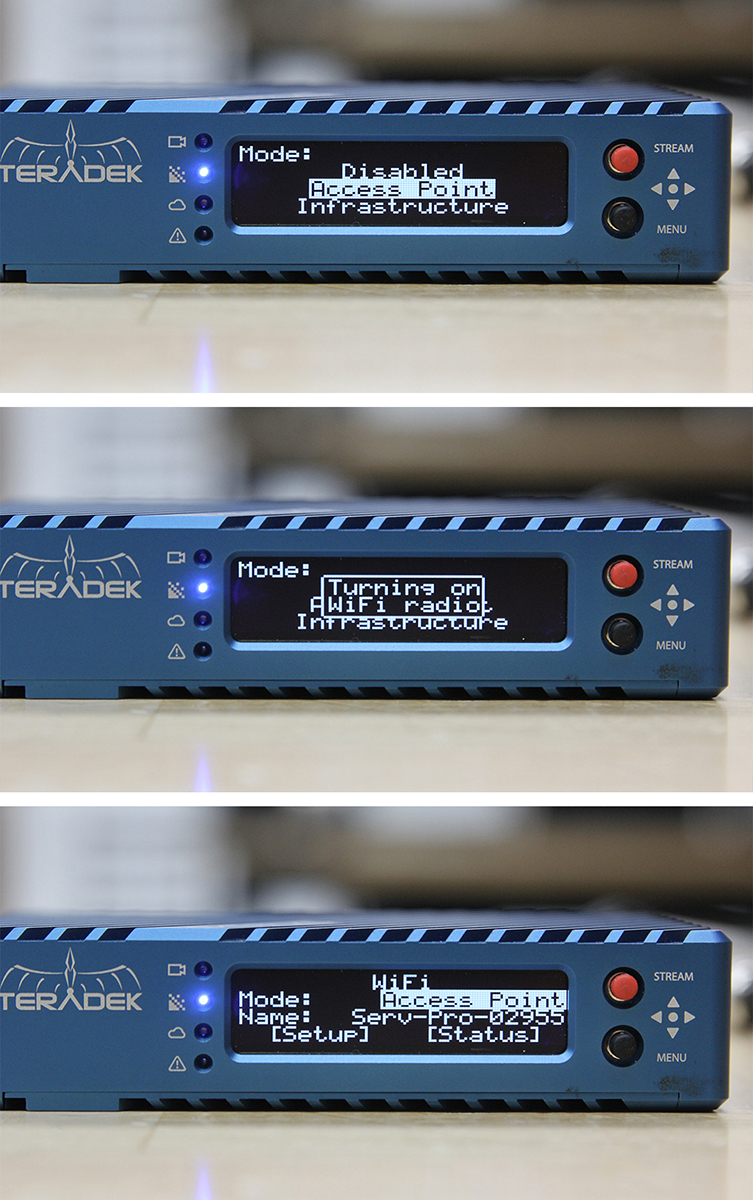
- Connect the power cable via 2Pin Lemo – DTap
- Connect the video signal cable (it can be HDMI or SDI from your camera)
- Power the Serv Pro on
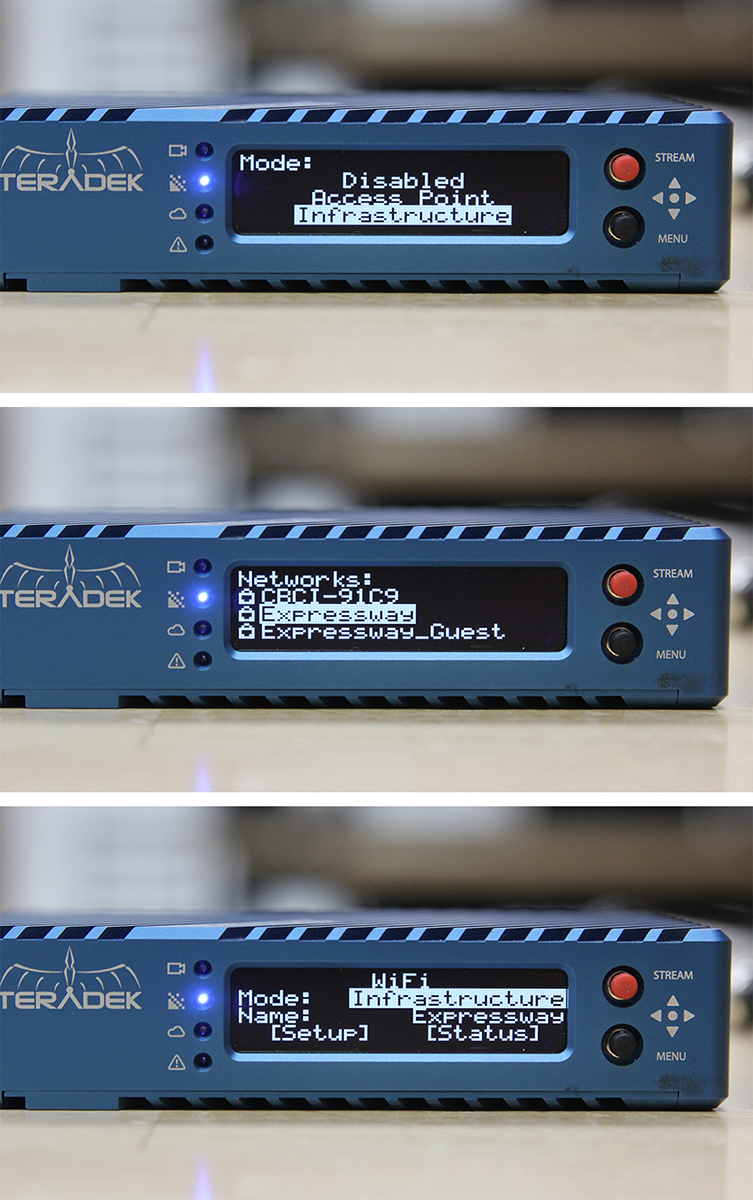
- Hit the menu button and navigate to Network Settings > WiFi > Access Point Mode
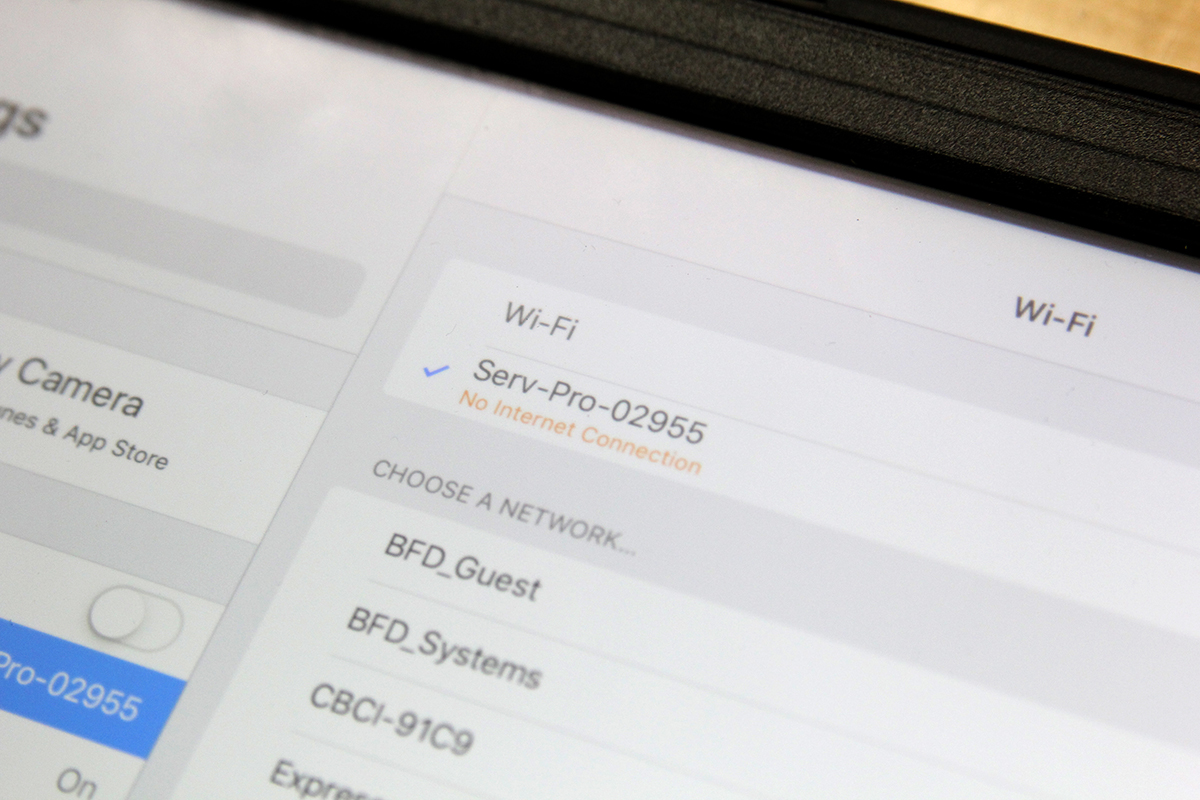
- Connect to the Serv Pro’s network on the iPad
- Open the Vuer app (free on app store)
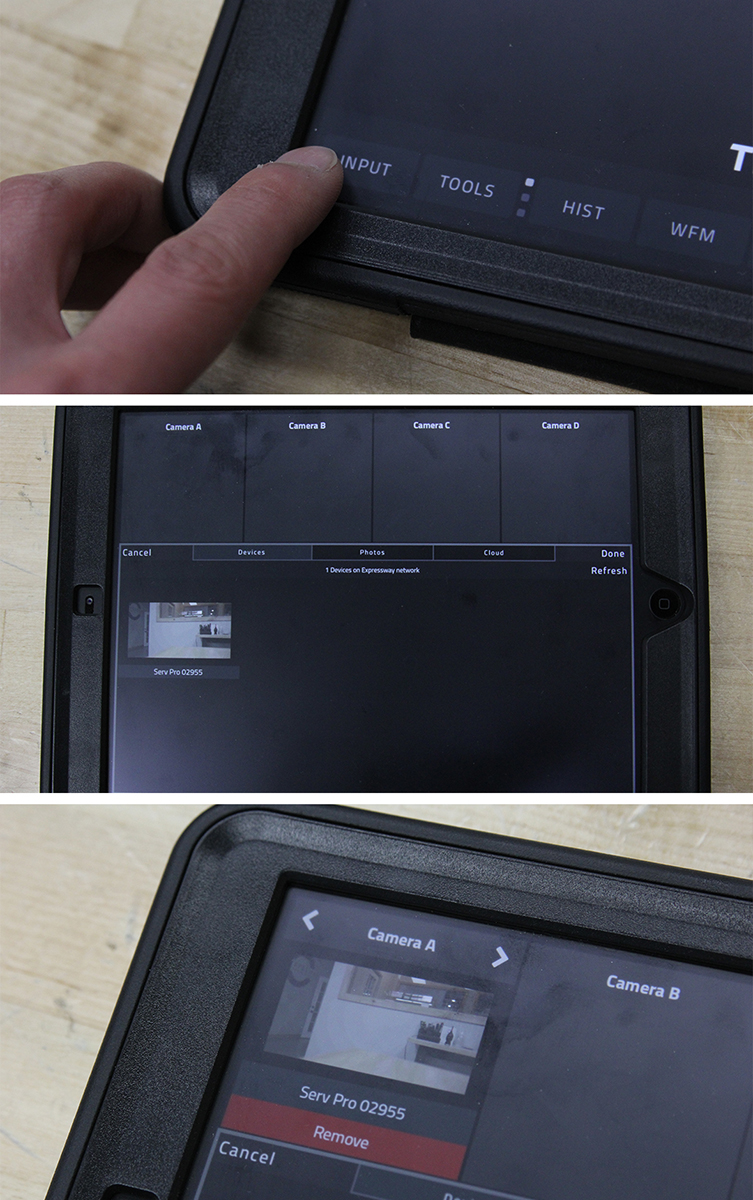
- Press and hold the “Input” button at the bottom left
- Tap the “Devices” tab and choose your device.
- If you do not see the Serv Pro, hit Refresh
- Once you tap the Serv Pro, it should allocate it to Camera A
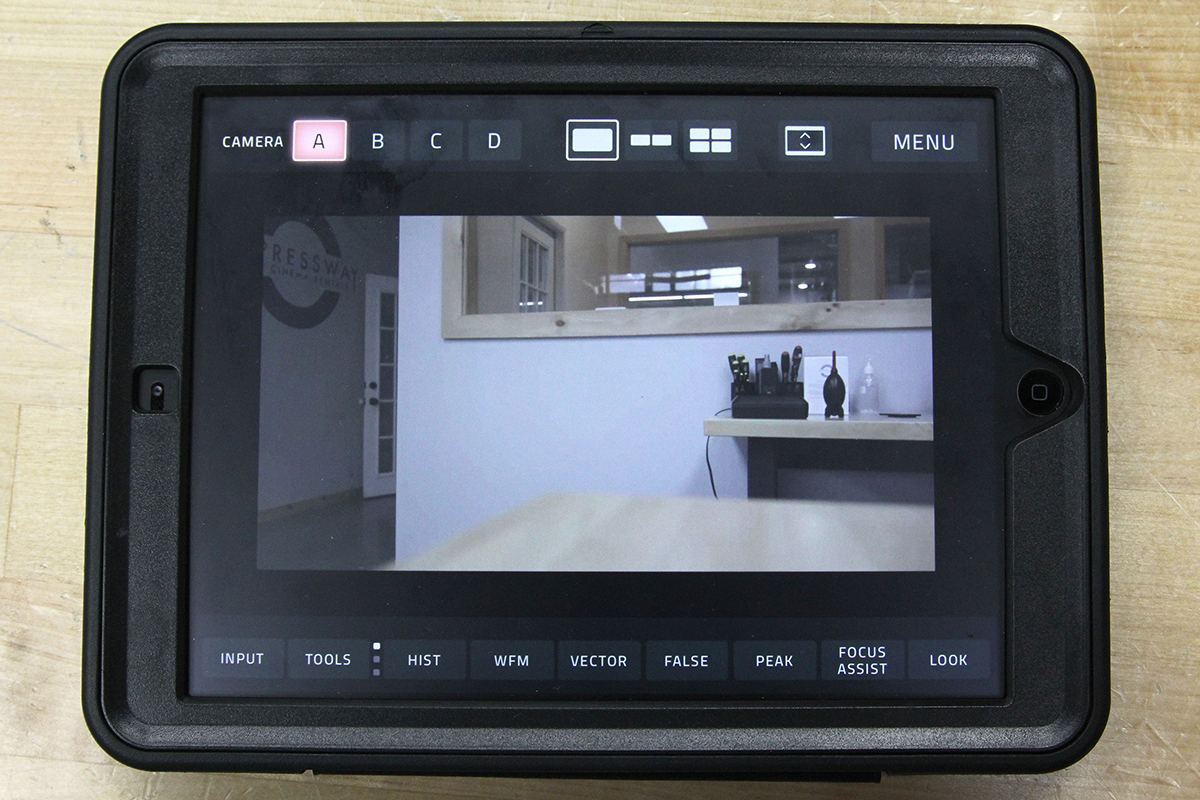
- Tap “Done” to take you back to the monitoring screen where you will now be able to view your feed.
Connecting to an Existing WiFi Network
Your second option is to connect the Serv Pro and your iOS or MacOS devices to an existing WiFi Network. Your range limit in this configuration will be based on how far the Serv Pro and the iOS devices can be from the router providing the WiFi Network without losing signal.
- Connect the power cable via the 2Pin Lemo – DTap
- Connect the video signal cable (it can be HDMI or SDI from your camera)
- Power the Serv Pro on
- Hit the menu button and navigate to Network Settings > WiFi > Infrastructure
- Hit the “Scan for Network” button.
- This will provide you with a list of existing WiFi Networks that you have access to.
- Choose the WiFi Network you’d like to use (in this example we’re using Expressway_Guest).
- If there’s a password to the network, enter it now.
- Once that is complete, check to make sure the name of the network on the display is the one you’ve just connected to.
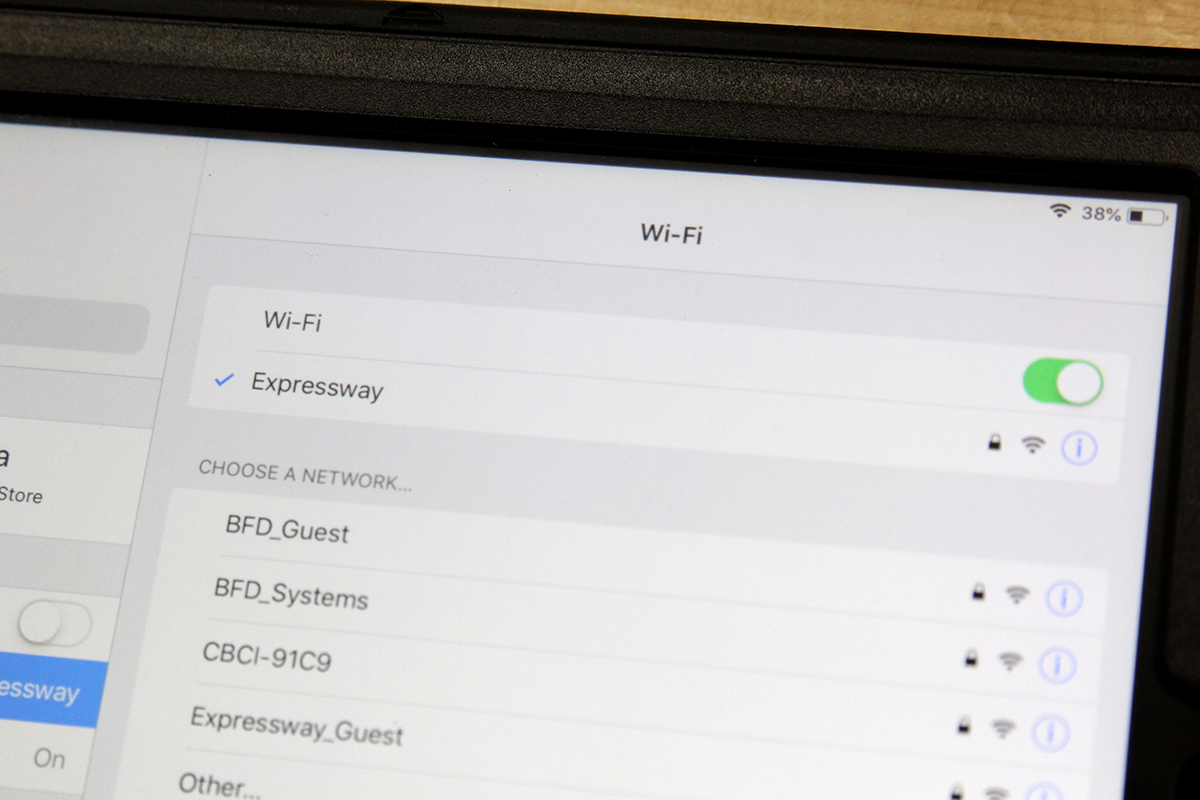
- On the iOS / MacOS Catalina Device connect to the same WiFi network that you’ve connected your Serv Pro to.
- Open the Vuer app (free on app store)
-
- Press and hold the “Input” button at the bottom left
- Tap the “Devices” tab and choose your device.
- If you do not see the Serv Pro, hit Refresh
- Once you tap the Serv Pro, it should allocate it to Camera A
- Tap “Done” to take you back to the monitoring screen where you will now be able to view your feed.
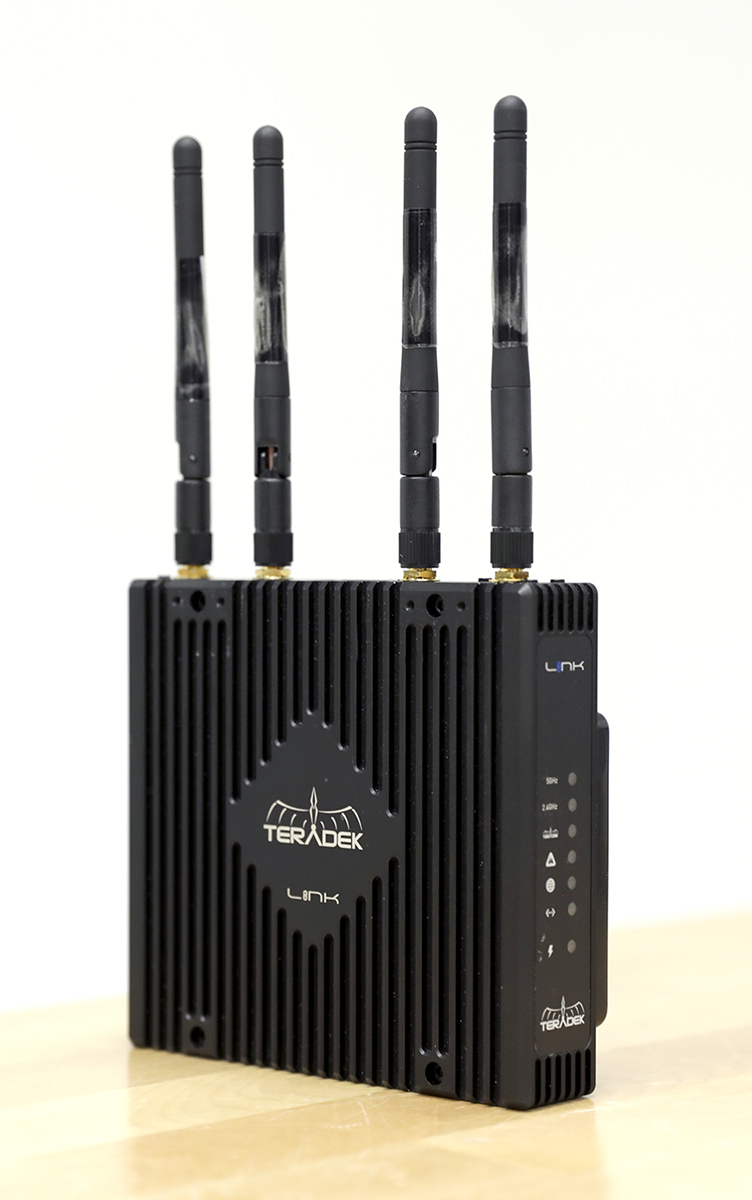
Teradek Link
With the addition of our Teradek Link Router, the Serv Pro can extend its 300 foot range to 1000 feet line-of-site. The Link also gives you the capability to add up to three additional Serv Pros and combine it into a single feed that can be viewed in the Vuer app for multi-cam productions.
Written By: Auggy Kim – Camera Department Director
Whenever he’s not taking care of our camera gear at Expressway, he’s playing an unhealthy amount of video games, eating Cronuts, and looking out of windows existentially.